
Sunday, November 27, 2011
Monday, October 31, 2011
Field Trip: Goya
I almost forgot about you Meatless Monday, pledge. But today is the 31st. Still October. Still made it.
I keep going back to Mexican recipes for my Meatless Monday round up. But its for good reason. I really never miss meat in Mexican food. And these enchiladas are no exception. I like to throw mushrooms in with this combo, but the original is so perfect no rewriting is really fair. I have a standby enchilada sauce recipe that I will share at some point (if I haven't already... Did I already post it? No idea. Lolz.) but wanted to try something different so I <gasp> actually followed the directions rather than substituting my most comfortable standby sauce. Except for my sub of dried oregano because unfortunately my name is not Ina Garten so I do not have herb bushes in my backyard in the Hamptons. BOO.
Okay. Field trip time. You do need to go out and head for the "ethnic foods" aisle near the Goya section to find some dried chiles. It will be worth the extra two minutes it will take to find them, randomly squeezed in hanging on the side of the shelf between lentils and recaito, where it definitely does not belong. Go forth and get thee some ranchero sauce. Don't substitute. Get the damn dried chiles. Mine were "New Mexico" chiles and perrrrrrrfection.
This is another fabulous Cooking Light recipe. Seriously the best 13 bucks I spent so far this year. I get an average of 5 meal ideas per issue. Their new Thanksgiving double issue is also aweeeesome. You've been warned.
~ *Black Bean and Cheese Enchiladas with Ranchero Sauce* ~
Ingredients
2 dried ancho chiles, stemmed and seeded
2 cups water
2 teaspoons olive oil
1 cup chopped yellow onion
5 garlic cloves, sliced
1/4 teaspoon kosher salt
2 cups organic vegetable broth
2 tablespoons chopped fresh oregano
2 tablespoons no-salt-added tomato paste
1/2 teaspoon ground cumin
1 tablespoon fresh lime juice
1/8 teaspoon ground red pepper
1 (15-ounce) can black beans, rinsed and drained
2 cups (8 ounces) preshredded reduced-fat 4-cheese Mexican-blend cheese, divided
3 thinly sliced green onions, divided
Cooking spray
12 (6-inch) corn tortillas
6 tablespoons light sour cream
Preparation
1. Preheat oven to 400°.
2. Combine chiles and 2 cups water in a saucepan; bring to a boil, reduce heat, and simmer 5 minutes. Remove from heat; let stand 5 minutes. Drain chiles in a colander over a bowl, reserving 1 cup cooking liquid.
3. Heat oil in a medium saucepan over high heat. Add onion; saute 1 minute. Reduce heat to medium; add garlic and salt. Cook 5 minutes or until golden, stirring occasionally. Add broth and next 3 ingredients (through cumin); cook 8 minutes or until thickened, stirring occasionally.
4. Pour onion mixture into a blender; add chiles and reserved liquid. Remove center piece of blender lid (to allow steam to escape); secure lid on blender. Place a clean towel over opening in lid. Blend until smooth; stir in lime juice and red pepper.
5. Combine the beans, 1 cup cheese, and half the green onions in a bowl. Spread 1/2 cup sauce in the bottom of a 13 x 9-inch glass or ceramic baking dish coated with cooking spray. Warm tortillas according to package directions. Spoon 3 tablespoons bean mixture down center of each tortilla; roll up. Place, seam-side down, in prepared dish. Pour remaining sauce over filled tortillas. Top with the remaining cheese. Bake at 400° for 15 minutes or until lightly browned. Sprinkle with remaining green onions; serve with sour cream.
Tuesday, October 25, 2011


Sunday, October 23, 2011
Tomato Gratin with Arugula Walnut Pesto
The wonderful Karina (one of my absolute favorite gluten free bloggers) inspired this recipe with her Pesto Zucchini Tomato Gratin, which I have made and LOOOVED. Perfect use for those amazing waffle bread crumbs and for your favorite pesto. Recently I've also experimented with a roasted red pepper pesto over salmon. This was my first attempt at a straight up arugula pesto and it was pretty darn tasty. And after my last pesto obsession ended in a case of pine nut mouth, I went with walnuts for this one. Omit the parmesan for vegan/casein free pesto.
And you should know that both my boyfriend and I are not the biggest tomato fans. We both have serious texture issues with the gushy inside and tend not to feature them like this in a recipe. So this preparation style for them is just THAT good. Another meatless monday, easy peasy. This probably takes a total of 30 minutes once ingredients are gathered, since the prep work is quick and pretty effortless with the help of your food processor.
Tomato Gratin with Arugula Walnut Pesto
Tomato Gratin
4 cups sliced roma tomatoes (1/2 inch thick slices)
1 cup gluten free bread crumbs mixed with a 1/2 tsp of parsley and oregano and 1 tsp of thyme and basil
balsamic vinegar, for drizzling
EVOO, for drizzling
parmesan cheese (thin slices of fresh mozz would be great here too)
Pesto
3/4 cup parmesan cheese
2 cloves of garlic
1 cup of walnuts
4 cups of arugula, stems removed
1/2 to 3/4 cup EVOO
Preheat oven to 375.
Begin my making pesto, using a food processor. Add garlic. If adding whole cloves, process until minced. Or add minced garlic. Add arugula, parmesan (if using) and walnuts and process on high, slowly pouring EVOO until mixture reaches desired texture, adding at least 1/2 a cup. Set aside.
Spread a thin, even layer of pesto in the bottom of a 11x9 baking dish. Press half of tomato slices into pesto. Drizzle with balsamic and EVOO. Sprinkle with parmesan. Top with 1/2 of the bread crumb/herb mixture. Press other half of tomatoes on top, layering. Spread another thin pesto on top of tomatoes. Drizzle with balsamic and EVOO. Sprinkle with parmesan and top with bread crumb/herb mixture. Bake for 20 minutes or until bubbly and tomatoes are cooked through.
Delicious over pasta with half the remaining pesto and a big splash of lowfat milk or fat free half and half , or simply prepared risotto rice again mixed with half the remaining pesto. Also lovely as a side to grilled fish or chicken.
Sunday, October 16, 2011
Stuffed Peppers
I adapted this recipe from October's Cooking Light. Theirs is for poblanos, which I am sure would be amazing, but I couldn't find any big enough to do the stuffing justice. I also killed the bulgur for quinoa, which I have not used nearly enough lately.
I don't know if you all have gotten the memo but stuffed peppers are totally trending. And by totally I mean that one of my friends made them this week and another one verbalized a desire to after hearing about both of our delicious dinners. So hop on board. This recipe should leave you with plenty of leftovers to get you meatless way beyond Monday.
I'm not sure that prior to making this I had ever made or eaten stuffed peppers. But I will be eating them again, probably soon, thanks to the yum you will find below.
8 bell peppers, kept intact, tops cut off, deseeded
1 cup of quinoa
2 cups of vegetable broth
2 15oz cans of pinto beans
1 4oz can of green chilis, undrained
1 cup of chopped onion
1 tablespoon of olive oil
2 oz goat cheese
2 tablespoons cumin
2 roma tomatoes, chopped
3 garlic cloves, minced
1 jalapeno pepper
2 tablespoons fresh lime juice
Preheat oven to 400 degrees.
1. Add two cups of vegetable broth to a medium saucepan. When it begins to boil, add quinoa. Cover and reduce to medium until quinoa is cooked, adding water if needed to soften further.
2. While quinoa cooks, prep peppers, chop onions, mince garlic etc.
3. Add oil to a large skillet. Sautee onion for 3 minutes. Add garlic. Brown for 1 minute. Add beans, chilis, cumin, tomatoes and lime juice and cook for at least 5 minutes, up to 10 until tomatoes and chilis are browning/blistering slightly. Stir in cooked quinoa.
4. Divide quinoa/bean mixture among peppers evenly, layering with a few crumbles of goat cheese throughout.
5. Bake for 20 minutes or until peppers are cooked through and blistering.
6. Top with salsa, if desired. Or two more chopped tomatoes, 1/2 cup of red onion, cilantro and a dash or two of lime juice, salt and pepper.
Sunday, October 9, 2011
Green Quinoa Pie
I almost forgot about my Meatless Monday recipe pledge. But I remembered just in the nick of time. And simultaneously remembered this recipe, which I will be making in the very near future.
This recipe satisfies crunchy and creamy cravings while still filling you up with plenty of fiber (from the flax) and protein (from the quinoa). I'm actually attempting to make stuffed peppers using quinoa in a few minutes and may use that as next week's post if all goes according to hare brained plan of the day.
Green Quinoa Pie
Ingredients
3/4 cup quinoa
2 oz goat cheese
1/4 cup shredded swiss cheese
1 lb frozen spinach
4 tablespoons diced shallots
5 oz arugula
2 tbls extra virgin olive oil
4 tablespoons flax meal
2 tablespoons grated parmesan cheese
3/4 cup egg beaters
Directions
1. Rinse and drain quinoa. Heat small saucepan and add quinoa,
turning frequently to toast 2- 3 minutes.
2. Add 1 1/2 cups of water, lower heat to medium and cover. Stir
frequently, adding more water for ~ 15 minutes or until quinoa is
tender. When quinoa is cooked, preheat oven to 350.
3. While quinoa cooks, add frozen spinach to a hot pan with 2 tbls
water. Add shallots and cover, stirring frequently until shallots are
translucent and soft and spinach is thawed/cooked. Add spinach/quinoa
mixture to a strainer and squeeze remaining liquid out.
4. Heat pan and add arugula, stirring frequently to wilt evenly.
Remove after 3 - 5 minutes.
5. Add wilted arugula, spinach, cooked shallots and cheeses to
quinoa mixture, stirring to integrate.
6. Lightly whisk egg beaters until slightly fluffy. Add to
quinoa/veggie mixture.
7. Put 1 tbls EVOO to 9 inch pie pan and put it in the oven to heat
for 5 minutes. Remove and add mixture, patting down.
8. Mix flax meal and parmesan in a bowl and sprinkle liberally over
the top of the pie, covering well. Press down.
9. Bake for 20 minutes. Drizzle last tbls of EVOO over top and bake
for another 20 minutes.
10. Chow down.
Tuesday, October 4, 2011
HUMMUS!
Anyone catch the subtle Pearl Jam reference in the title?
In the process of sorting all my recipes on the handy dandy recipe page, I realized that I have quite a few vegetarian recipes up here. I was thinking back to how it all started.
At first it was a few Meatless Mondays here and there. Who am I to defy Yoko and Paul's twitter directives? Then I was eating Meatless Monday leftovers on Tuesdays and Wednesdays. Plus, my default lunch of choice when I didn't bring food - the giant bodega sandwich - was no longer an option after going gluten free. So pretty soon, I wasn't eating meat during the week and saving it up for the weekends. This is largely what I shoot for now, though I am far from perfect. There are times I seriously consider going full vegetarian, but I am really held up by not being able to eat many veggie/vegan meat substitutes like tempeh, seitan and many tofu products. I have yet to find any commercially available veggie chicken (though my favorite vegan lunch spot which also has gluten free bread and AMAZING gluten free wraps has some!), soy crumbles etc. I used to swap meat out of many Mexican dishes in particular (two veggie taco recipes coming up for next week!) for those awesome proteins and haven't quite overcome not being able to use them. I also still have the occasional bad day where I feel totally limited with food choices because of my allergies, and adopting a stricter vegetarian outlook would probably bring those about more often.
I have had great success utilizing mushrooms run through the food processor in place of ground meats, though. And found a fail proof grilling formula that will make you crave 'bellas like they are a truly fantastic burger. AND realized that I could top it with daiya cheese (IT MELTS!) and not miss a beat. Woo-hoo.
So whether you are doing so for your health, the health of our planet or intially just because Paul and Yoko said so, I'm going to try and offer my support by posting recipes on Sundays/early Mondays for MEATLESS MONDAY at least for the rest of October. Let's see if I can keep up...
Hummus is a perfect Meatless Monday pick that can stretch out way beyond . You can use it in wraps during the week (I like mine with arugula, cheese and tomato/cucumber) for lunch, as a topper for chicken and salads. Chickpeas are naturally high in protein and fiber. They also provide a healthy carbohydrate profile for people with Diabetes or blood sugar issues. I scarfed mine up in a wrap, simply with some Mary's Gone Crackers Curry Twigs, with Trader Joe's sweet potato chips and baby carrots. And I'm sure there a million other applications I haven't been creative enough to consider. Enjoy!
Roasted Red Pepper and Garlic Hummus
2 cups of canned chickpeas
3 roasted red peppers (totally optional but awesome for taste and texture)
3 cloves of garlic (you can roast garlic in the oven for 20 minutes before mixing in if you dislike raw garlic)
1/3 cup tahini
juice of 2 lemons (at least 6 tablespoons or to taste)
1/4 tsp of salt
1 tsp of black pepper
reserved liquid from can of chickpeas or warm water (at least 2 tablespoons)
Mince or press garlic. Add tahini, chickpeas, 6 tablespoons of lemon juice, roasted red peppers, salt and pepper to a food processor and combine well. Add reserved liquid from can of chickpeas and additional lemon juice until it reaches your desired consistency. De - freaking - licious.
Enjoy!
Sunday, October 2, 2011
Garlicky Green Gratin / the case for kale
Cooking Light featured this recipe in their cheap eats section in October's magazine. Here is how to make it gluten free and ramp up the flavor with bitter greens and prevent the watery results many testers got from making this recipe per their original directions.
I like Kale any ol' time, but it is harvested in the fall (through LATE fall) since it is super hearty and can survive frost, making it cost effective since it can be locally grown and is perfectly in season right now, when many veggies go up in price. It doesn't cook down as much as spinach and has a bitter, peppery taste that is a real stand out among typical savory.
This right here is a great QUICK cook ahead meal. Perfect for making after dinner on Sunday and enjoying during the week as a lunch on its own or for dinner with a side of brown basmati rice, oven roasted potatoes or blanched lemony asparagus. Serves 4.
I actually made this last Sunday and we didn't touch it until Wednesday. I think refrigerating this after baking sets the mixture a bit more, making for a firmer casserole.
Ingredients
- 1 tablespoon olive oil
- 1 cup chopped onion
- 6 garlic cloves, coarsely chopped
- 6 ounces pork or turkey sausage, removed from casing
- 1/4 teaspoon ground red pepper
- 1 teaspoon dried thyme
- 1/2 teaspoon nutmeg (or less per your taste - I LOVE nutmeg! allspice or even cinnamon can be substituted)
- 2 tablespoons gluten free flour (I used Bob's Red Mill white rice flour)
- 2 cups skim or 1% milk
- 2 large eggs, lightly beaten
- 8 ounces fresh kale
- 4 ounces fresh arugula
- Cooking spray
- 1/3 cup grated parmesan cheese
- 1/2 cup gluten free bread crumbs (I am still using toasted and processed gluten free waffles)
Directions
1. Preheat oven to 450°.
- 2. Heat a Dutch oven or large stock pot over medium-high heat. Add 1 tablespoon oil; swirl. Add onion; sauté 4 minutes. Add garlic; sauté 1 minute, stirring constantly. Add sausage, salt, and pepper; sauté 5 minutes, stirring to crumble.
- 3. Stir in flour; sauté 30 seconds, stirring constantly. Combine milk and eggs, stirring well. Reduce heat to medium. Stir milk mixture into sausage mixture; bring to a boil, stir in kale and cook for 5 minutes. Remove from heat; fold in arugula. Spoon mixture into a glass or ceramic baking dish coated with cooking spray. The greater the surface area, the firmer the mixture will set while baking.
- 4. Add 1/2 cup of gluten free bread crumbs to the top of mixture. Top with parmesan cheese. Bake for 12 minutes or until bubbly and golden brown on top.
Friday, September 16, 2011
Everyday Taco Salad
I got an email from South Beach diet the other day with a recipe for taco salad that sounded amazing. Except it was full of expensive shit I didnt have on hand or intend to drop money on. So this recipe was born from that idea. Taco salad with ingredients on hand. Deeelicious. Especially the beans, which I will make again as a side for sure.
3/4 lb lean ground beef or 2 1/2 cups soy crumbles
1 tablespoon EVOO
1 tablespoon oregano
1 teaspoon paprika (smoked paprika is even better)
1 tablespoon chili powder
1 tablespoon cumin
10 oz fresh spinach, roughly chopped
3/4 large red onion, roughly chopped
1 large tomato
1 cup of shredded cheddar cheese (fat free is fine, i used daiya - which is gluten free, vegan and delicious)
spicy sweet black beans
29 oz canned black beans, rinsed, drained and pat dry
1 tablespoon EVOO
3 tablespoons honey
2 tablespoons chopped fresh cilantro
2 tablespoons apple cider vinegar
1 teaspoon crushed red pepper flakes (or to taste)
dressing
2 tablespoons fage 0% greek yogurt
2 tablespoons dijon mustard
2 tablespoons champagne vinegar
1 tablespoon lowfat sour cream
1 oz goat cheese, crumbled
1 tablespoon oregano
1/2 teaspoon garlic powder
1/8 teaspoon salt
rinse and drain beans. pat dry with papertowels. add EVOO to a large skillet and wait 30 seconds. add beans, cilantro, honey and apple cider vinegar. when liquid begins to reduce and become stickier and beans are soft, add red pepper flakes. set aside in a large bowl to cool slightly.
mix oregano, paprika, chili powder and cumin in a small bowl with a whisk while a large skillet heats up with EVOO. add beef to EVOO and stir in seasonings, breaking up beef. sautee for 3 minutes or until lightly browned. roughly chop 1 large tomato, squeezing out juice/seeds with your hands and add to beef mixture, sauteeing for 5 minutes or until cooked through and tomato skin begins to blister slightly.
meanwhile, roughly chop spinach and red onion, tossing with cheddar. add to bowl with beans. top with meat mixture and toss.
whisk together everything but goat cheese. gently stir/fold in goat cheese crumbles and top individual servings of salad. yum.
Wednesday, August 31, 2011
... Crab Cakes ...
It is very hard for me to use the word or ingredient CRAB seriously. Mostly because my darling Andrea and I have been calling eachother crab for the last few years after a brief obsession with hermit crabs. This recipe and post is for her, obvs.
I needed a quick meal tonight and remembered I had a few cans of crab meat in my massive suburban pantry. (Don't tell Ina Garten that I used canned crab meat. She'll never forgive me. We're best friends in my head, laughing as we pick fresh herbs from her Hamptons garden. Shut up. )
After a bit of internetting, I found the following recipe. The original is a bit high on cholesterol and sodium. You can omit the worcestshire if sodium is a concern and perhaps use egg alternative or two egg whites or vegan mayo in place of the regular to drop the cholesterol down.
Mmmmmmmmmmmmmmmmmmmmmmmmmmm. Nutritional information on the bottom is for original recipe with all the high fat fixins. Substitute away, friends. And do yourselves a favor, sautee these in coconut oil for a touch of added sweetness. Thank you to Laura and Tim for turning me on to that wonderful stuff!
Maryland Style Crab Cakes!
18oz crab meat, picked through for shells and drained if in liquid
4 tsp mayonnaise
1 egg1 1/2 tsp worcestershire sauce
1 1/2 tsp old bay seasoning
1 tbsp onion, grated
1/2 tsp dijon mustard
1 tbsp dried or 2 tbsp fresh parsley
6 tbsp crushed gluten free crackers or bread crumbs (aka 1 frozen waffle, toasted and processed)
Add egg to a large bowl. Whisk until slightly frothy.
Whisk in mayo, worcestershire, old bay, onion, dijon and parsley until well combined. Stir in crab meat. Gently fold in bread crumbs/crackers.
Form crab mixture into 8 evenly sized, flat patties. Think hockey puck sized.
Preheat a large skillet or griddle over medium heat. Add 1 tbsp coconut oil to skillet. Add crab cakes, cooking for 3 - 4 minutes on each side or until deep golden brown. Try to only turn them once to lower the risk of cracking.

These were fantastic with a side of pasta (in lemon zest/juice, creme fraiche, veggie broth and green onions) and sauteed red and yellow peppers, also in coconut oil. Mmmmmm mmm.
Nutrition info (in 2 crab cakes) : 224 calories; 10g off at (5 saturated); 127mg cholesterol; 1131mg sodium; 13g carbohydrates; 2g fiber; 1g sugar; 18g protein
Sunday, August 28, 2011
FRITTATA FRENZY
I have seriously been neglecting the original content portions of this blog. To make up for it, I bestow upon you all a frenzy of frittata recipes. Frittatas are easy midweek meals to throw together and serve with potatoes or a great salad. I also love them for lazy weekends since one will get two people through breakfasts with a little to spare.
The first version I made below was created based on what veggies I had around thanks to my parents picking everything from their garden to avoid it all being trashed by the hurricane. I'll give you three different versions to choose from, but you can really swap any vegetables or cheeses that you like. I've even made it with light sour cream instead of ricotta in a pinch. Frittatas are great because you can pretty much throw in whatever you have in the fridge. You can also knock out some more of the calories by using egg beaters or egg whites, without compromising the overall texture of the dish.
For an added fiber boost and crunch factor, add ground flax meal to the top before baking. Today, I processed a gluten free frozen waffle in my food processor and topped the first frittata with that.
Frittata a la Irene
5 eggs (or 1 + 1/4 cup egg beaters/egg whites)
1 cup of part skim ricotta cheese
3 oz goat cheese
3 oz parmesan cheese, finely grated
1 large zucchini, sliced into long matchsticks and cut into quarters
2 roasted red peppers
1/2 large spanish onion, thinly sliced and diced
Moroccan seasoning blend (Fresh Direct's is fantastic)
In a large frying pan, add cooking spray and onions. While onions cook, dice zucchini. I like to cut it into thin match sticks and then into quarters. Once onions are translucent, add zucchini and at least one tablespoon desired dried seasoning. With this vegetable combination, I used a Moroccan seasoning mix which was delicious.
Preheat oven to 375.
While zucchini cooks until tender and lightly browned (you should be able to easily slice with your cooking spoon), add 5 eggs (or substitute 1 1/4 cups egg beaters or egg whites) and beat until slightly frothy. Add ricotta and stir until well integrated. Crumble goat cheese and stir, leaving crumbles intact for pockets of cheese.
Take vegetables off the heat and add to a bowl to cool slightly. Meanwhile, thinly slice and dice roasted red peppers (2 should be fine) and stir into egg mixture. Once onion/zucchini mixture is partially cooled, stir this into egg mixture as well.
Pour combined egg, vegetable and cheese mixture into baking dish. I like a pyrex pie dish for this. Bake at 375 for at least 25 minutes or until frittata is browned all around and firmly set in the center.
Greek Frittata
5 eggs
3/4 cup feta cheese
1 cup part skim ricotta
3/4 cup grated parmesan/reggiano
3 or 4 roasted red peppers, cleaned of seeds and finely diced
10 oz spinach, finely chopped, frozen or fresh
1/2 small package of fresh mushrooms, washed and finely diced
red/black pepper
dried oregano
1/2 red onion, diced
1/2 tsp all spice
Same as the above. Cook the vegetables, allow them to cool a bit and add to egg and cheese mixtures.
Mexican Frittata
5 eggs
3/4 cup queso fresco, monterey jack or pepper jack
1 cup part skim ricotta
3/4 cup grated parmesan/reggiano
1 cup of diced green chiles (any heat level)
2 bell peppers, chopped
1 can of black or pinto beans, rinsed
red/black pepper
cilantro
1/2 red onion or 2 green onions, diced
Same as the above. Cook the vegetables, allow them to cool a bit and add to egg and cheese mixtures.
Sunday, July 31, 2011
Cooking Light goes Gluten Free!
On August 2nd, Cooking Light magazine is releasing a Gluten Free cookbook!

I am a huge fan of Cooking Light. I like their recipes and their focus on health and balance versus dieting, so I am psyched. You can read more about the release here.
There are a few reviews up on Amazon already which are not good. One star was given in each, in fact. And the complaints are typical. Between seeing comments on recipes around the web and scanning through my email comments, the following two criticisms are eeeeeverywhere.
Here are the big two.
1. The recipes rely on store bought mixes like Pamela's, Bob's Red Mill, Bisquick gluten free etc.
2. The recipes are "naturally" gluten free and focus around meat and vegetables etc.
Now, I love carbs as much as the next person. But just because you are eating gluten free does NOT mean that every meal needs to have a gluten substitute in it. I actually assume this is why many people unintentionally gain weight on a gluten free diet (not including those who were malnourished due to celiac and NEED to gain weight). I fell victim to the same thinking when I first went gluten free, eating anything and everything that was labeled gluten free, saying - HEY! I CAN EAT THIS! - to myself. Can does not mean should or need to. Shouldn't we be enjoying "naturally" gluten free foods too? Like proteins, vegetables and fruits - some of the most wholesome food choices out there? What is wrong with someone putting out a collection that includes many of those recipes? I do limit my carbohydrate intake and really appreciate gluten free recipes that aren't all about swapping one flour or starch for another.
My issue with the complaints for this particular book is related to who is publishing it. If you read Cooking Light or use their recipes, you'll find that many of their recipes are protein and vegetable centric, gluten free or not. I probably use 2 to 3 recipes from each magazine and rarely if ever have to make gluten free exchanges.
I'm excited for the idea of having the gluten free recipes together in one collection. Not having to scour recipes and new ingredient labels does save time when shopping and cooking during the week. I am also in favor of getting gluten free marketing away from packaged goods. But I also know that when I do bake or cook with gluten substitutes, time is of the essence, and I often do buy pre-blended flour mixes. I don't have the kitchen space to store 10 different types of flours and often get annoyed when "fast recipes" involve measuring five different types of flour. Part laziness, part realism. Just because I have a food allergy doesn't mean I have hours to devote to cooking each day.
So my take on this new collection? Thank you Cooking Light for helping the gluten free community focus on wholesome foods (that aren't always about the carbs) with convenience in mind.
Tuesday, June 28, 2011
Gluten Free in... New Jersey?
Yes, folks. I have moved across the smelly river back to the much less smelly than everyone thinks land known as Dirty Jerz as of May of 2011. While I am still slightly ambivalent about how this plays out for many of my closest friendships, my career etc, I see this as a great thing for this blog, as gluten free friendly restaurants don't seem to be nearly as obvious/lauded outside of cities, so this is a great way of exposing myself and my readers to new, safe places to eat.
Early picks that are delish:
Zinburger
Clifton, NJ
Burgers
*Freaking FANTASTIC burgers. Go bunless. They'll provide you with extra lettuce wedges as a substitute if you request it. Most of their french fries are safe for celiac consumption. As are most of the burgers. My favorites so far are the kobe cheeseburger and the namesake zinburger. The servers aren't super knowledgeable overall (it varies quite a bit, very much a luck of the draw situation) but the managers and chef are on top of it. I just asked questions at my first visit, not explicitly saying that I had an allergy and they guessed this and gave me a full rundown of what was kosher for me to eat. Awesome! I keep promising myself that I'll try more of the french fry varietals, but the first ones I sampled, their "double truffle" fries, were safe (including truffle dipping sauce) and all sorts of good.
Joe's American Grill
Short Hills, NJ and Paramus, NJ
American/Pub
*I was shocked when I read elsewhere on the web that Joe's was a fantastic gluten free pick, since all I remember about them was the fantastic bread that they put out at the beginning of the meal. They might oversell themselves a tad (example: ALL OUR PIZZAS AND PASTAS CAN BE MADE GLUTEN FREE... except the two I first tried to order). That said, their manager was fantastic. He personally served all of my food, assuring me each time that he supervised all the cooking and that their line cooks were knowledgeable about cross contamination.
Portobello
Oakland, NJ
Italian
*Gluten free pasta can be subbed in all dishes except for those with white cream sauces with a bechamel base. Many gluten free apps are available, and the wait staff was on top of it.
Tinga
Upper Montclair, NJ
Mexican
*Mexican is usually the easiest choice as most sauces are naturally thickened (read: without flour) and corn tortillas are found in abundance. Tinga offers slamming tacos (beef brisket and shrimp are my current favorites) and enchiladas that are safe. They are also willing to substitute corn tortillas for flour in any case that works without really compromising the dish, which is great.
Terrazza
Nutley, NJ
Italian
*Chef was highly knowledgeable about which dishes were safe. I had the beef short ribs over risotto - fantastic and safe, as the risotto is prepared in a beef stock. Delicious! They advertise on their website that they offer gluten free pastas as a substitution, but didn't have any the night I stopped in. And it didn't sound like they were just "out" and needing to order more, either.
Happy eating!
Sunday, June 5, 2011
I am so in favor of this article.
Looking for a Plan B? Make it Gluten Free
http://www.nytimes.com/2011/06/05/fashion/gluten-free-bakeries-and-cafes.html?_r=1&hpw
I do like to bake. But I like being lazy and wandering into a bakery and being able to eat something a whole lot more.
NY Times is all over the Gluten free shtuff this week. Earlier, an article touting how so many gluten free products are now completely delicious. And EVEN a gluten free pizza recipe!
Love. Love. Love.
Monday, May 16, 2011
the curse of pine nut mouth
Okay. Confession time: I am a bit of a hypochondriac. (Note: this may be the largest understatement ever made.) So its not terribly unusual for me to google symptoms as they happen and diagnose myself with the bubonic plague, lupus, brain tumors etc etc etc. I also recently made a joke that if I had a television show it would be called I Always Think I'm Pregnant.
This in mind, I successfully diagnosed myself via googling.... with PINE NUT MOUTH. Ugh.
I had some absolutely fantastic pesto, made with pine nuts, basil, arugula, garlic and parmesan, a few days this week on a tomato-zucchini gratin. It was absolutely delicious. Until I started getting a weird taste in my mouth that I could only describe as soapy and metallic that came back anytime I ate or drank anything, especially savory foods. At first I thought my yogurt was bad. Then I assumed the same about some chips I was snacking on. And then I had a burger that looked absolutely fantastic and still tasted like metal. These symptoms are apparently common with pine nuts that are imported from china, russia and vietnam. A few studies seem to attribute it to non-edible variations of pine nuts making it into the market. Others assume its an additive, others still believe the offending nuts to be rancid. You can read more here, thanks to Grace Tan, a scientist who took up the task of figuring out this mysterious pine nut syndrome.
My extensive googling confirmed the diagnosis but didn't tell me much about how to make it better. It seems like waiting it out is the consensus. But here are a few tips that made my few days of metallic soapy taste a little more bearable.
Three things improved the bad taste:
1. 1 tablespoon of apple cider vinegar in 10 oz of water, taken before meals
2. squeezing fresh lemon directly on my tongue / drinking water with several lemon wedges while finishing meals (as the taste is the worst after meals)
3. salty and spicy foods
Things to avoid:
1. sweet foods (the momentary relief leads to terrible bitter rebound - GROSS)
2. savory foods (especially cheese, which was heartbreaking)
3. starchy foods (potatoes, breads etc)
I did not come across literature on any problematic Spanish or Italian pine nuts. So if you need to use them in the above fabulous pesto (btw, cashews and walnuts make excellent substitutes) try and make good choices. Trader Joe's, Whole Foods and Costco are all continuing to sell these delightfully rancid treats, so make sure you are reading labels carefully about where the nuts (and nut mixes that contain pine nuts) are imported from.
Not exactly a gluten free dilemma, but relevant to happy, incident free eating. Choose those nuts wisely, friends*.
*(that's what she said)
Thursday, May 12, 2011
Encourage the Girl Scouts to sell an allergen free cookie!
My wonderful friend Nikki saw this and sent it to me. I couldn't resist passing it on.
I would probably consider committing light treason for a gluten free Samoa...
http://www.change.org/petitions/encourage-the-girl-scouts-to-sell-an-allergen-free-cookie
overview of petition from change.org:
It is that time of year again for Girl Scout cookies. It is also Celiac Awareness Month and Food Allergy Awareness Week May 8-14, 2011 and for those with a food allergy, many, if not all of the Girl Scout cookies are off limits. Consumers have a choice not to buy the cookies. However, members of the Girl Scouts are encouraged to sell the cookies to learn skills, obtain prizes and be part of an organization. Despite this, the organization isn’t doing enough to support and incorporate its members that have food allergies.
Nationwide, for 2009, the most recent year studied by the Center for Disease Control, the estimate for children with food allergies was 5%. For adults, the number is 4% in America according to the Food Allergen and Anaphylaxis Network. In 2010, the Journal of the American Medical Association estimated the number could be as high as 10%.
Based on these statistics, then approximately 132,000 members of the approximately 3,300,000 Girls Scouts are selling cookies that they may not be able to eat. Additionally, the Girls Scouts are leaving out up to 10% of the American marketplace who cannot buy their cookies.
The Girl Scouts license their cookies to two companies: ABC Bakers and Little Brownie Bakers. Both companies have been contacted by myself and others inquiring about them producing an allergen free cookie and I have been advised that there isn’t enough of a market to support such a product. ABC Bakers even states on their website that there isn’t enough of a demand for a cookie that is free from either sugar or gluten. However, what these two bakers and the Girl Scouts have never tried is to market just one cookie that is free from the top eight food allergens.
The cookie manufacturers and Girl Scouts have indicated that when they see enough of a need, they will consider manufacturing such a cookie. If you or a member of your family have a food allergy and you have not been able to buy Girl Scout cookies because of this, please sign this petition letting the Girl Scouts know that they have lost out on your business but you would buy a box of cookies from them if they made a delicious cookie that is free from the top eight food allergens.
Although no support is too much, it is requested that only those that would buy a delicious, allergen free cookie sign this petition so that the Girl Scouts and its bakers know that there is a market for this and it would be profitable. Concern for those with allergies is not enough for a company to make a business decision. The Girl Scouts and its bakers need to see that this will be a profitable venture for them in order for us to encourage them to take on this endeavor and offer their first ever allergen free cookie.
Thanks to Stacy Malinow for starting the petition!
Monday, April 4, 2011
Comfort by Chicken
I've noticed something interesting while eating in restaurants amid recent laziness. It isn't necessarily hard to avoid more obvious forms of wheat/gluten like pasta or bread. Where things get tricky lie with breadcrumbs, thickened sauces and the like, which affect a celiac's ability to eat quite a bit of restaurant foods. I missed chicken cutlets the most of all out of the breaded foods, so when I finally found some amazing gluten free breadcrumbs and had to come up with a good test I very quickly decided on fried chicken, or in this case, oven fried chicken. Yummmmm.
Oven Fried Puerto Rican Chicken

6 chicken tenders, pounded to 1/3 - 1/4 inch evenly
1 eggs, beaten
3 tablespoons dried goya adobo seasoning, divided into 2 and 1 tablespoon
1 tablespoon oregano
2 tablespoons paprika
1 1/4 cups GF bread crumbs
2 tablespoons EVOO
Preheat the oven to 400 degrees.
Lay room temperature chicken tenders between two sheets saran wrap on a cooking board and pound out the day's stress. Set aside.
Beat an egg with 1 tbsp adobo and pour into a dish.
Mix bread crumbs with remaining adobo, oregano and paprika and pour into a separate dish. Set the dishes next to eachother.
Dip the chicken in egg mixture, rolling it around in the mixture several times. Then pat the chicken into breadcrumb mixture, spooning mixture over chicken, turning over and repeating to ensure equal, substantial breading all around.
Liberally rush EVOO with a pastry brush on the bottom of a baking sheet with a lip. Put chicken on the baking sheet. Sprinkle with oil by covering most of the EVOO bottle's spout with your finger so that the oil forms a few thin ribbons of oil on each chicken piece.
Bake for 10 - 12 minutes.
While chicken bakes, you can make this gluten free honey mustard recipe.
Gluten Free Honey Mustard
1/3 cup gluten free mayonnaise
2 tablespoons dijon mustard (gotta go grey poupon) or 1 tablespoon dijon and 1 tablespoon whole grain mustard, for texture
2 tablespoons honey
optional: 1 tsp lemon juice
Mix it all together. Here comes the hard part: try not to eat it all with your fingers before you get it on the table.
This all combines well with a heaping side of creamy spinach. And/Or Gluten Free Girl's Classic Mac and Cheese. If you have leftover breadcrumbs, use them to top of the mac and cheese or add some crunch to the below spinach recipe.
Creamy Spinach
2 tablespoons light cream cheese (neufetchel or block)
16 oz frozen spinach, at least partially thawed
1 tbsp EVOO
nutmeg
cracked black pepper
Heat a small saucepan over medium high heat. When pot is hot, add 1/2 of the EVOO. Add spinach and stir, breaking up clumps. After about two minutes, add the rest of the EVOO and a large pinch of nutmeg. Roughly ground some pepper. Once spinach is cooked and warmed through, add cream cheese and stir to integrate, removing from heat once all the chunks of cream cheese have cooked down.
Oven Fried Puerto Rican Chicken

(This picture sucks. I need a new camera.)
6 chicken tenders, pounded to 1/3 - 1/4 inch evenly
1 eggs, beaten
3 tablespoons dried goya adobo seasoning, divided into 2 and 1 tablespoon
1 tablespoon oregano
2 tablespoons paprika
1 1/4 cups GF bread crumbs
2 tablespoons EVOO
Preheat the oven to 400 degrees.
Lay room temperature chicken tenders between two sheets saran wrap on a cooking board and pound out the day's stress. Set aside.
Beat an egg with 1 tbsp adobo and pour into a dish.
Mix bread crumbs with remaining adobo, oregano and paprika and pour into a separate dish. Set the dishes next to eachother.
Dip the chicken in egg mixture, rolling it around in the mixture several times. Then pat the chicken into breadcrumb mixture, spooning mixture over chicken, turning over and repeating to ensure equal, substantial breading all around.
Liberally rush EVOO with a pastry brush on the bottom of a baking sheet with a lip. Put chicken on the baking sheet. Sprinkle with oil by covering most of the EVOO bottle's spout with your finger so that the oil forms a few thin ribbons of oil on each chicken piece.
Bake for 10 - 12 minutes.
While chicken bakes, you can make this gluten free honey mustard recipe.
Gluten Free Honey Mustard
1/3 cup gluten free mayonnaise
2 tablespoons dijon mustard (gotta go grey poupon) or 1 tablespoon dijon and 1 tablespoon whole grain mustard, for texture
2 tablespoons honey
optional: 1 tsp lemon juice
Mix it all together. Here comes the hard part: try not to eat it all with your fingers before you get it on the table.
This all combines well with a heaping side of creamy spinach. And/Or Gluten Free Girl's Classic Mac and Cheese. If you have leftover breadcrumbs, use them to top of the mac and cheese or add some crunch to the below spinach recipe.
Creamy Spinach
2 tablespoons light cream cheese (neufetchel or block)
16 oz frozen spinach, at least partially thawed
1 tbsp EVOO
nutmeg
cracked black pepper
Heat a small saucepan over medium high heat. When pot is hot, add 1/2 of the EVOO. Add spinach and stir, breaking up clumps. After about two minutes, add the rest of the EVOO and a large pinch of nutmeg. Roughly ground some pepper. Once spinach is cooked and warmed through, add cream cheese and stir to integrate, removing from heat once all the chunks of cream cheese have cooked down.
Sunday, March 27, 2011
What to expect when you're...getting an endoscopy
Relax, Mom. I'm not pregnant. Note: My mother went to a psychic a few months back who told her someone close to her is going to get pregnant this year and I was her first thought. Thanks, Mom!
I wish the the above titled book was as widely distributed as the played with title I referenced. I initially went to a GI doctor in February after waiting 6 1/2 months for an appointment, as he was supposedly the best of the best. His immediate recommendation after an exam was that I get an endoscopy, given that I still had some positive symptoms. Three weeks later, there I was, walking into New York Presbyterian, thinking I had a minor annoyance in front of me. Then I got counseling on the endoscopy during intake, a consult with the anesthesiologist and my doctor, and I freaked. F-r-e-a-k-e-d. The idea of being half conscious while something was put down my throat that would make me feel like I'm choking for 30 seconds that I have no control over just did not sit well with me. I wish my doctor, who otherwise is great, had been a bit more up front about the procedure and what to anticipate, both during AND after. More than few tears later, I opted for a deeper sedation that actually wore off faster than the typically used conscious sedation. I cannot recommend this enough. I slept through the procedure and was pretty alert right afterwards.
Now comes the fun part. I was told that I couldn't eat for a few hours after the procedure. No problem, I thought. What they didn't explain was that I wouldn't WANT to eat a few hours later. Or that I wouldn't be able to eat solid food for about 48 hours without wincing and getting tears in my eyes. Now, I have a pretty high tolerance for pain. I mean, I walked around pretty miserable with nausea, stomach upset, heartburn, migraines, body aches and fatigue for about the last 5 years and rarely complained. But I was miserable after this procedure.
As it turns out, my esophagus in particular was in horrible shape. That getting rubbed may have made my pain worse than yours will be, given that its not the most common of the celiac stomach symptoms. But it was my most pronounced per the exam, and possibly because of that, I was so terribly unprepared for the days that followed. Since celiacs tend to be extra sensitive, I suggest you prepare juuust to be on the safe side.
So, this in mind, here is my list of recommendations:
- Stock up on pain killers and throat numbing spray.
- Make sure you have thin soup and juice on hand for the first day.
- Fill your pantry and fridge with mushy stuff. My suggestions: eggs, yogurt, cottage cheese, goat cheese, gluten free farina (cream of buckwheat, cream of rice cereals), applesauce. I'll give you my favorite recipe with variations, at the end of this post, that I probably made 2x a day for the three days following until it didn't hurt to swallow anything firmer/crunchier.
- Take off from work both the day of your procedure and the day after if at all possible. You may be well enough to go home but that doesn't mean you should push it. I woke up the morning after my endoscopy rather drowsy and had to call out.
Post Endoscopy 5 Minute Protein Fix
2 eggs
1 oz goat cheese1/3 cup cream of rice or cream of buckwheat cereal
1 cup of lukewarm water
1 tsp seasoning of your choice (I used Adobo and Fresh Direct's Moroccan mix alternately to make this feel different even though I ate it four times in three days)
white vinegar
1 tsp butter, smart balance or earth balance spread
1. Boil two cups of water in a small sauce pot that has a tight fitting lid. When the water is boiling, add one to two capfuls of white vinegar. This will help the poached eggs and their whites hold together. Crack the eggs, dropping them slowly into the boiling water. Let the water stay at a rolling boil for 15 - 30 seconds, shut off heat and close the lid tightly. Leave for at least one minute or longer if you prefer your eggs cooked more firmly. I like 'em runny. Gently strain out water and put the eggs back in the small pot with the lid on.
2. In a larger saucepot (only to make the whisking easier), boil one cup of water.
3. As water heats, stir seasoning into cereal to evenly distribute.
4. When water boils, whisk cereal into water, pouring slowly. Lower the heat to medium and continue to whisk until mixture reaches your desired thickness. You can add more water for thinner and let it cook longer for thicker.
5. Pour cereal into bowl. Stir in goat cheese and butter/spread. Top with eggs.
I like to mash the eggs into the cereal as the yolks make everything tastier and creamier.
Seriously a clutch, easy recipe when I wanted something more substantial but didn't feel like swallowing what felt like broken glass. You pretty much have to make this one serving at a time, as it doesn't keep well.
Happy biopsy-ing.
Friday, February 25, 2011
Gluten Free Cooperstown!
Well, folks, I braved that which lies beyond Westchester and Rockland County. I went UPSTATE (gasp). During the WINTER (horror). And I lived to tell the tale... without so much as even getting cross contaminated.
Granted, I'm sure this is horribly ethnocentric of me, but I fear eating outside of NYC. In a place where waiters have seen it all and heard it all, many are well versed in food allergies and willing to mess around with the menu to get me something good.
My awesome, awesome boyfriend and I ventured up north to Cooperstown, home of the baseball hall of fame, for a romantic long weekend between his birthday and Valentine's Day. The weekend was great. And surprisingly, so was the food! I definitely did my fair share of planning, reading menus mostly, and ended up finding many a gluten free treat in this quaint little town.
Strolling down Main Street, we saw Danny's Main Street Italian Market, which had a sign in the window boasting that they now served gluten free baked goods and muffins. Too bad they were closed for the weekend... But all the same, I report to you all that it exists and has good reviews on Google.
Lucky for us celiacs, Cooperstown is a breakfast town, and breakfast is the easiest meal to do gluten free (unless you go to IHOP where those fascists put pancake mix in their omelettes for some strange reason) thanks to the incredible, edible egg. Both cafes we chose for breakfast/brunch (Doubleday Cafe and the super tiny Cooperstown Diner) kept the toast off the plate and my tummy happy with their awesome omelettes. All I had to say was no toast - I have a severe wheat allergy, and I was good to go.
For dinner, I highly recommend Alex and Ika. Their menu boasted "continental cuisine" which normally makes me think about a bad buffet at a wedding, but that is not what you'll find here. The steamed clams and scallop appetizers were fantastic, as was my steak entree. And all were gluten free without any modifications necessary! Their menu changes seasonally, but based on the attitude of the wait staff, you should have no problem finding something that works easily (and tastily) for you here.
For the inbetween meals and snacks, I was dying to try some of Cooperstown's famous chili. We stumbled into The Pit, beneath the Tunnicliff Inn and sampled some of the town's finest, also naturally gluten free.
Happy Hall of Faming!
((Psssst! Anyone looking for a hotel recommendation? I wanted privacy - no B&Bs for this girl. And Gateway Inn & Suites really delivered. We got a free upgrade. Room was clean, cozy and warm. Perfect for unwinding after a long day of touristy fun. I know the website is a wee bit ghetto, but the Inn is not at all.))
Tuesday, February 22, 2011
Risotteria aka Gluten Free risotto heaven
Sorry it has been so long! You can tell how much cooking I've been doing lately...
After a weekend adventure in Cooperstown, where I discovered that yes, Virginia, the suburbs DO have gluten free surprises in store (more on that in a post to come), I was back on a restaurant kick which motivated me to venture below 14th Street (something I rarely do) and hit up Risotteria which will be known henceforth as Gluten Free heaven.
Risotteria is a casual, bustling Italian bistro in the village, quickly serving up tasty treats for Celiacs and their companions. They have gluten free beer and beverages, gluten free breadsticks to start (seen below, accompanying the ridiculously tasty gluten free meatball appetizer I split with my honey) and a whole menu of gluten free goodness. They also boast an in store frozen section, which is under the cash register and a bakery counter. I walked away with 4 loaves of Ciabatta bread for the hefty price of 18 dollars. It is gooooood, though.
Even more exciting were the cupcakes. So exciting in fact that I forgot to take pictures before I practically swallowed them whole. You'll have to forgive me for that. A combination of hormones and 6 months GF actually brought tears to my eyes during Valentines Day dinner when the bread basket was placed on our table. So cupcakes were in order that week and Risotteria's more than satisified. Red Velvet was the star of the show. I'm hoping to get back to Babycakes in the next few weeks for a comparison review, but we'll see.
The startling thing about Risotteria is that it seats maybe 20 people. And the food comes out FAST. So fast in fact that I nervously sighed when my risotto came out no more than 10 minutes after ordering, figuring that this would be nowhere near as authentic and perfect as I had hoped. But I was wrong. I don't know how they do it, but oh do they do it up good. I chose the arugula, parma ham and fontina cheese risotto and was not disappointed. Frank's sauseeeeej and mushroom risotto was tasty too.
 Our meatball appetizer. Two meatballs, bolognese sauce and the perfect breadsticks...

My risotto. Hellllllloooooooo.
I tend to operate as though I can find something I can eat anywhere I go. This has ALMOST (fuck you Brooklyn Diner) always been true.
But sometimes, I don't want to be barely accomodated when I go out to eat. I want to be indulged and catered to. And I don't want to cry when the bread basket appears. For those days where accomodation just won't do, and the tears are bubbling up, there is Risotteria.
After a weekend adventure in Cooperstown, where I discovered that yes, Virginia, the suburbs DO have gluten free surprises in store (more on that in a post to come), I was back on a restaurant kick which motivated me to venture below 14th Street (something I rarely do) and hit up Risotteria which will be known henceforth as Gluten Free heaven.
Risotteria is a casual, bustling Italian bistro in the village, quickly serving up tasty treats for Celiacs and their companions. They have gluten free beer and beverages, gluten free breadsticks to start (seen below, accompanying the ridiculously tasty gluten free meatball appetizer I split with my honey) and a whole menu of gluten free goodness. They also boast an in store frozen section, which is under the cash register and a bakery counter. I walked away with 4 loaves of Ciabatta bread for the hefty price of 18 dollars. It is gooooood, though.
Even more exciting were the cupcakes. So exciting in fact that I forgot to take pictures before I practically swallowed them whole. You'll have to forgive me for that. A combination of hormones and 6 months GF actually brought tears to my eyes during Valentines Day dinner when the bread basket was placed on our table. So cupcakes were in order that week and Risotteria's more than satisified. Red Velvet was the star of the show. I'm hoping to get back to Babycakes in the next few weeks for a comparison review, but we'll see.
The startling thing about Risotteria is that it seats maybe 20 people. And the food comes out FAST. So fast in fact that I nervously sighed when my risotto came out no more than 10 minutes after ordering, figuring that this would be nowhere near as authentic and perfect as I had hoped. But I was wrong. I don't know how they do it, but oh do they do it up good. I chose the arugula, parma ham and fontina cheese risotto and was not disappointed. Frank's sauseeeeej and mushroom risotto was tasty too.


My risotto. Hellllllloooooooo.
I tend to operate as though I can find something I can eat anywhere I go. This has ALMOST (fuck you Brooklyn Diner) always been true.
But sometimes, I don't want to be barely accomodated when I go out to eat. I want to be indulged and catered to. And I don't want to cry when the bread basket appears. For those days where accomodation just won't do, and the tears are bubbling up, there is Risotteria.
Monday, January 24, 2011
A little POM to wake up the winter palate is a WONDERFUL thing.
I miss summer produce. I am definitely still getting my fill of winter veggies, but mannnn do I miss summer fruits and all their bright flavors. Regardless of where in the world you are, you can get a dose of bright fruity flavor by getting yourself some POM juice. Great in reductions and salad dressings that need a wake up.

So, I turned to this recipe, Rachael Ray's initially, reworked below by me, to brighten things up a bit and work some tart and sweet in to shake up my winter meal blues.
Chicken with Pom Reduction, Potato Hash and Mediterranean Salad

4 chicken breasts
pinch of kosher salt
black pepper
Pomegranate Reduction
8oz POM Wonderful 100% Pomegranate Juice
2 tbls balsamic vinegar
8 peppercorns
5 cloves
1 bayleaf or 1 tablespoon of dried thyme
Arugula, Fig and Gorgonzola Salad
1/2 pint of figs, such as Trader Joe's black mission figs
3 - 4 oz crumbled Gorgonzola cheese
3 cups of arugula
juice of 1 fresh lemon (I used a meyer lemon and it was perfect! 1 and a half lemons if yours are small)
black pepper (fresh roughly ground peppercorns will be best here)
2 tbls EVOO
Potato Hash
1/4 lb turkey bacon
3-4 potatoes, sliced thinly and chopped
1 shallot, thinly sliced and chopped
Add POM juice to a small saucepan with vinegar, peppercorns, cloves and bay leaf/thyme.
Bring to a boil over medium heat, then turn the heat down to a low simmer and reduce the liquid by
half, about 6 minutes. Keep this on low while you complete the rest of the meal, whisking occasionally to keep the mixture together.
Meanwhile, cover the chicken with plastic wrap on meat-safe cutting board and exorcise those demons, pounding chicken to 1/4-inch thickness. Season the chicken on both sides with salt and pepper to taste.
Heat a large nonstick skillet over medium-high heat with some EVOO, for the chicken.
Heat a second medium-size skillet over medium-high heat with 1 tablespoon of EVOO.
Add the turkey bacon to the smaller skillet with the potatoes and shallots in thin layer and season with a little salt, black pepper and thyme, to taste. Cook, turning occasionally, for 8-10 minutes until potatoes are easily speared with a fork.
Once the hash begins to crisp, add the chicken and cook for about 8 minutes, turning once.
Strain the reduced pomegranate sauce into the skillet with the chicken and scrape up any bits from the bottom of the pan, then turn off the heat. Press the herb mixture from the pomegranate sauce into the strainer to really release all the liquid. Allow the chicken to rest in the pomegranate sauce while you prepare the salad.
Halve or quarter figs, adding them to a large bowl with crumbled gorgonzola. Add the arugula and drizzle with the lemon juice and about 2 tablespoons of EVOO. Season with roughly ground peppercorns and a tiny pinch of kosher salt, to taste.
Serves 4.
Per serving: 391 calories; 8g of fat; 4g of saturated fat; 39mg cholesterol; 591mg sodium; 68g carbohydrates; 10g dietary fiber; 34g sugar; 15g protein
...and 58% of your recommended daily amount of vitamin C! Suck it, winter colds.
Monday, January 17, 2011
Turkey Greek Loaf, a food of compromise
This recipe came about after I wanted turkey burgers and greek food and my boyfriend wanted meatloaf. So. freaking. good.
Turkey Greek Loaf
Heat a skillet over medium high heat, adding EVOO after 30 seconds. Add chopped onion and 1 tbsp of oregano, crushing it in your hands before adding to skillet to release flavor. Add half of the dried dill. After onion is softened, about 2 - 3 minutes, add garlic, sauteing until fragrant and onions are translucent. Set aside to cool.
Preheat oven to 350.
Rip up bread into small pieces and put in the bottom of a medium mixing bowl. Beat egg and add to mixing bowl, along with milk and a dash of worcestershire sauce. Stir. Add cooled onions and garlic, turkey, thawed spinach and crumbled feta. Add 2 tbsp of all spice and remainder of oregano and dill. Mix with hands until well integrated and cohesive.
Grease a metal loaf pan with oil and add meat mixture, pressing down to form a tight loaf. Bake for 20 minutes at 350, and for 10 more at 400 until brown all the way through.
Turkey Greek Loaf
- 1 lb ground turkey breast
- 4 oz light feta cheese
- 10 oz frozen chopped spinach
- 1 tsp Extra Virgin Olive Oil
- 1 egg
- 1 slice bread (I used Glutino's flax and brown rice bread)
- 1 1/2 tbsp skim milk
- 1 medium onion, diced (red or white/yellow is fine)
- 3 cloves of garlic
- 2 tbsp oregano
- 1 tsp dill
- 1 tsp low sodium worcestershire Sauce
- 2 tbsp all spice (I LOVE this one)
Heat a skillet over medium high heat, adding EVOO after 30 seconds. Add chopped onion and 1 tbsp of oregano, crushing it in your hands before adding to skillet to release flavor. Add half of the dried dill. After onion is softened, about 2 - 3 minutes, add garlic, sauteing until fragrant and onions are translucent. Set aside to cool.
Preheat oven to 350.
Rip up bread into small pieces and put in the bottom of a medium mixing bowl. Beat egg and add to mixing bowl, along with milk and a dash of worcestershire sauce. Stir. Add cooled onions and garlic, turkey, thawed spinach and crumbled feta. Add 2 tbsp of all spice and remainder of oregano and dill. Mix with hands until well integrated and cohesive.
Grease a metal loaf pan with oil and add meat mixture, pressing down to form a tight loaf. Bake for 20 minutes at 350, and for 10 more at 400 until brown all the way through.
Friday, January 14, 2011
Shake Shack goes gluten free!
http://shakeshack.com/mobile/menu/glutenfree.php
Reposted here for your convenience (and mine!)
Go bunless! Enjoy a ShackBurger®, Hamburger or Cheeseburger (single, double or triple) sans the bun. This option goes for all our burgers except the 'Shroom Burger, which has breadcrumbs in it.
Try any of our dogs – just lose the bun. Drag 'em through the garden too, if you're looking for an even fuller flavor!
The fries are gluten-free, but if you have severe reactions to trace amounts of gluten, it might be best to skip the fries. See, our fryers prepare the 'Shrooms in separate oil, but each night the oils get filtered through the same equipment.
Frozen Custards are a-okay without the cones. But before ordering the custard of the day, double-check the ingredients with our cashier to make sure it's gluten-free. Shakes are okay too, just not malted.
All our soft drinks are safe, and assuming you're over 21, you can even have a glass of wine with that ShackBurger® (minus the bun, of course)! Just be sure to stay away from the beer.
Reposted here for your convenience (and mine!)
Gluten-Free Options


Steer clear of all other toppings and cones. |

Wednesday, January 12, 2011
Gluten Free (and yeast free!) Pizza at Home
I have been up to some spectacular things in my kitchen and have been sooo looking forward to sharing. Happy 2011! Anyway...
When I tell someone about my celiac, pizza comes up quickly on their horrified list of "YOU MEAN YOU CAN'T HAVE _________ ? OR __________? (Because what's really awesome, people, is being reminded of shit I can't eat. Reaaally special.) OH MY GOD! OH MY GOOOODDDD! HOW DO YOU DO IT?"
Now, even before I became GF, I fancied myself a master of recipe substitutions and creating lightened up comfort food. The answer to their question is make it freaking work somehow. I like the foods I like. The key was how to make them healthy.
Beyond healthy now, they also must be gluten free, which presents new challenges. I had mastered GF mac and cheese within two weeks of getting diagnosed, no surprise. But I'm just getting around to pizza now, 6 months later. Even though its not anywhere near the top of my personal list of glutenous delicious things that I miss dearly, I hear it from most people I talk to about my allergy. And see all over the internet that celiacs are clamoring for GF pizza. Granted, its bread, sauce and cheese. It can't really be BAD, can it? But yes, from the reviews I've read of many, many recipes it apparently can.
Here are two options for having gluten free pizza at home. Below you will find one version with a frozen crust my mother found at a market in Jersey and one that I made from scratch at home in about 30 minutes. Both are tasty, I promise.
Contender 1: Glutino's gluten free pizza crusts, which come reasonably price for a pack of 4 which are ready after 20 minutes in the oven. I suggest baking for 10, adding your toppings and putting it back in for 5 - 10 more minutes.
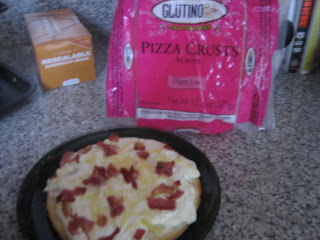
Mine has ricotta, swiss and pancetta. Not bad for a lazy Saturday, right?
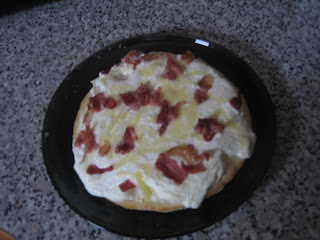
These turn out crispy on the bottom while still chewy the way good NY pizza should be. Not bad for something that required no defrost out of the freezer.
Now, we have a slightly more ambitious endeavor. But considering these two pizzas take up virtually the same amount of time, I'd say go for the gold and follow this recipe here. No pizza pan? No problem. I greased up a regular old rectangular baking sheet that had a lip and it worked perfectly. And its yeast free too!
super easy gluten free pizza crust
1 cup cornstarch
1 cup all purpose GF baking flour mix (I used Pamela's)
1 and 1/3 cups milk (I used 1%, so even skim should be fine)
1 teaspoon EVOO
4 eggs
1 large pinch of salt (maybe 1/4 - 1/2 teaspoon?)
2 tablespoons seasonings (I used rosemary, red pepper flakes, basil and garlic powder since I was doing Italian toppings)
*Mix gently with a whisk until lumps are no more. Don't overmix!
*Pour batter into well greased pizza pan or baking sheet. (I chose the word batter here very carefully. This mixture is going to seem WAY too liquidy and wet to turn into pizza, but it does.)
*Bake at 425F for 10 - 12 minutes or until it is firmly set, resembling crust, and starting to brown slightly on the edges and underneath. (For a crispier crust, brush top with EVOO and add five additional minutes of baking time).
*Add toppings and bake for an additional 7 - 10 minutes or until everything is melty and the crust is golden brown on the edges and underneath. It will smell fabulous when it's done.
How good does this look?

Topped with tomato sauce, part skim ricotta, part skim mozzarella and basil.
And a close up, so you can see how awesome and full of air holes the crust is. Closest thing I've had to regular, crispy on the bottom, chewy in the middle New York pizza since I've been gluten free, for suuuuure.

Woohoo! Pizza may make it closer to the top of my list after all.
Subscribe to:
Posts (Atom)